lundi 16 juillet 2012

Evidences

In my family, cooking is a normal, natural part of the daily routine. All through her working career, my (now retired) mother even had a weekly cooking routine : she'd cook easy dishes that didn't need a lot of prep time through the week, then on Saturday morning my parents would go grocery shopping at the market, and on Sunday morning my mother would take over the kitchen, make something a little fancier than usual for lunch, and often cook a second batch, or another dish she would freeze for later. In the summer month and during the summer vacations, she'd buy cheap, almost too ripe fruit in bulk to make jam. I've seen her and my father's mother cook for so long it all seemed natural to me. Watching my other grandmother's nearly non-existent cooking habits should have made me realize that cooking might not be as natural but... no.
I nearly fell off my chair when I heard a girl my age didn't know how to make jam. And then again when I read a bunch of jam recipes. Why should things be so complicated ? Making jam is simple, if slightly time-consuming. But seeing as you make a year's jam supply with each fruity batch, the time issue becomes much more relative.
This is my mother's general recipes, the one we use to make strawberry jam, apricot jam, apple-and-rhubarb jam, apple-and-quince jam, plum jam, cherry jam. My mother just cuts the fruit into not-too-big pieces, I prefer to run a hand-blender through mine just before I put them into the jars.

A few things to consider
  • It does not take much longer to prepare 5 pounds of jam than just one, so as long as you're not experimenting with a new-to-you fruit or fruits combination, go ahead and make a big batch. Just make sure your cooking pot(s) is big enough and you have enough jars.
  • You will prepare the fruit and sugar in the evening, and cook the jam the next day.
  • Be sure to have (enough) jars clean, dry and ready when the jam is done. I leave them (and their lids) for 20 minutes in boiling water to sterilize them and then just let them air dry on a clean towel. If you're unsure about how many jars you'll use, prepare a few more.
  • The jars will be HOT right after you've filled them. I tend to schedule my jam-making for when I can leave them on the table to cool for a few hours afterwards (not too close to the table’s edge, so that the little fingers won't get burnt !)
  • Think about how you will seal your jars. I mostly use screw-on lids, depending on what jars I have at hand.
  • Pectin is often concentrated in seeds and skin. When making apple jam, I put the apple cores I have cut out into a small, closed cloth bag and let it cook with the jam.
  • You will need a LONG spoon (to reach the bottom of the cooking pot without burning your fingers), preferably of wood, to stir the jam and ladle to put it into the jars.
The trusty jam recipe
Wash, it necessary peel, stone, dice the fruit. Weigh it and place it in the pot you will use to cook it. Add the same weigh of sugar. Cover and let it sit for 8 to 24 hours, until a) you have time and b) there's a good quantity of juice in the pot.
Place a clean plate in your fridge.
Bring the pot over onto the stove, and turn the heat on. Once the jam is boiling, turn the heat down so that is keeps happily blubbering without overflowing. Stir regularly, all through the bottom of the pot to prevent the fruit from adhering to it. Check on your jam regularly to make sure it is not trying to escape from the pot (jams takes up a LOT more space when boiling and can overflow easily), stir some more. Do NOT cover the pot, as the water needs to evaporate - plus, the jam would run over pretty quickly.
Let the jam on the stove for 30 minutes to one hour. To check whether or not it is done, take the plate out of the fridge and pour just one drop of jam onto it. It should turn almost solid instantly and not run if you move the plate. If it does, let the jam cook for some more.
When the jam is ready, use a ladle to pour it into the jars. I re-use store-bought jam jars, pickle jars... and their lids. Right after I've filled the jars, I screw the lid on and turn the jar on its head (being careful not to burn my fingers !). I turn them back on their "feet" once the jam has cooled.
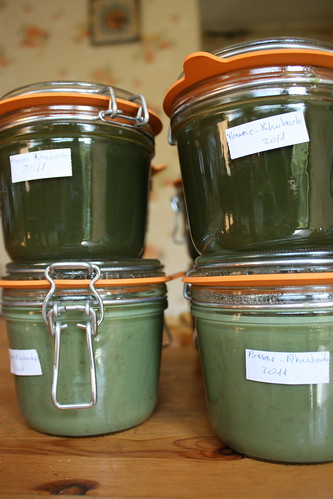
Label the jars (I write down what it is and when I made it) and store them in a cool, dry place. As long as they've been thoroughly cooked and well sealed, they can keep for some years.

De-bugging
Sometimes jam does not keep perfectly... It does not mean you need to throw that whole batch from last year away.
  • cristallization : sugar cristals, mostly on the surface of the jam, caused by too much sugar, overcooking it or storing it in a too warm place. Just add 1 or 2 tablespoons of boiling water to dissolve the sugar before eating the jam. And next time you make jam out of this fruit, use a little less sugar.
  • mold : it can happen if the jam hasn't been cooked enough. If it's just a little bit in one pot, carefully take it out, store the jar in the fridge and eat this jar first. If the whole batch shows mold, you will have to cook it again. Empty the jars in a pot, boil the jam again, clean the jars, etc.

dimanche 15 juillet 2012

To each their own...

... chocolate mousse recipe !
Every person I've met had their particular recipe. Some had tried half a dozen before they found the one they claimed was THE recipe. Well, I'm no exception, I have my own recipe as well, combined for my own taste from several others.
Actually, this is not just a chocolate mousse recipe. This is one of my staple recipes to use leftover egg whites. Because one can get tired of meringue and still want to have some home-made mayonnaise.


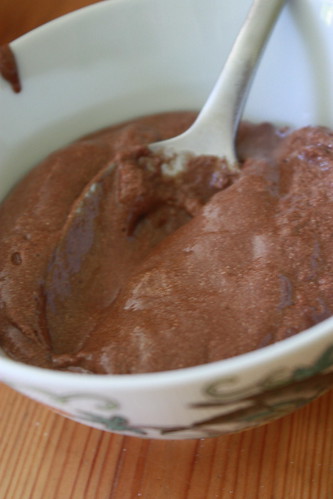
Spiced chocolate mousse with only egg whites
9oz dark chocolate
4 egg whites
1 tsp cinnamon
1 pinch ginger
2 tbsp sugar
1/2 cup almond cream

Beat the egg whites until they are very stiff (they are when you can turn the bowl upside down and nothing moves). Still beating, add the sugar.
Cut the chocolate into small pieces, add 2 spoons of water and slowly melt it in the microwave. Add the spices and the cream. Gently fold the chocolate into the egg whites (not the other way round !) and place the mousse in the fridge for at least 6 hours.

This one has to sit in the cold for quite some time to set. It stays a little creamy (especially at the end of the bowl), but very light. As a good rule of thumb, one egg white makes for one portion, so this should serve four guests.

Dip dip dip

It is hot here. The weather forecast keeps promising us rain... tomorrow. It's always "tomorrow". And it stays this way. In my quest for summer recipes that don't turn my kitchen into a sauna, I have turned to dips. I made a little more variety than usual as we had guests yesterday. There was the trusty guacamole, as well as the eggplant caviar, and then some more. I made another trusty preparation, almond tapenade from this blog, translated here for your convenience.

Clockwise from top left : eggplant caviar,
humus, tuna-hazelnut spread, tapenade
Almond tapenade
1/2 cup almond butter
1/2 cup green olives, pitted

Rinse the olives in running water, mix everything together. You can add more or less almond paste depending on your taste. If the tapenade is a little too thick, add a dash of olive oil.

Then I got a little bit more experimental, and I tried my hand at something I'd never done before : humus. I only had a can of chick pas. I'd have preferred the dry kind (as the humus turned out a bit salty for my taste), but well... you do with what you have.

Vegan humus
1 can chick peas (garbanzo beans)
1 cup oat cream
1 clove garlic
2 tbsp chopped fresh coriander (okay, it was frozen coriander, my usual seller wasn't at the market lately)
1 tbsp tahini

Blend together using your mixer until smooth.
I was not so convinced right out of the bowl, the taste was better after  few hours in the fridge. A lot better, considering how many servings the guests took.

Lastly I was craving something with salmon. But I had no smoked salmon, could not find any at the store I went to, and the smoked salmon spread recipe I had involved fresh cheese anyway.This is were I got very experimental, and I must say, it worked !

Tuna-hazelnut spread
1 1/2 cup whole hazelnuts
1 can tuna (8 oz or so)
1 cup oat cream
1/2 oat milk

In a mixing bowl, blend the hazelnuts into a fine power. Keep blending and let the hazelnut power get a little warm. Add the rest of the ingredients and keep blending until you get a smooth cream.

I served everything with grilled spare ribs, sticks of red bell pepper, cucumber, endive and fresh bread. It was very good and I had leftovers for the next day. I will definitely keep tweaking the humus and tuna recipes, I'm sure they can be improved. I'll edit this post if I turn to a better version.

vendredi 13 juillet 2012

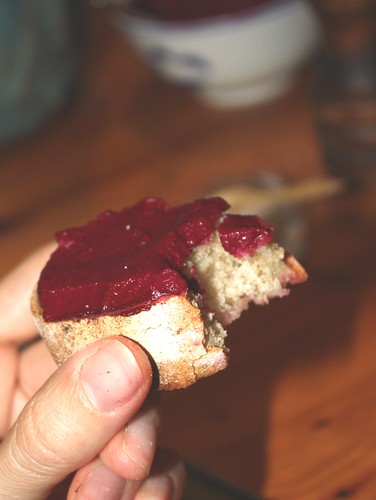
Spread the beet

I adore red beet. Cooked in stews, mashed, or diced into fresh salads all year round. My husband usually does not care for it, but we did find one recipe that he loved. It was a spread, and it involved mixing the beat with fresh goat cheese. That wouldn't do in our house. I thought about it for a bit, decided to try something out and... bingo ! It worked AND the home geek loved it.
The best part is that it is super quick and easy to make, as long as you have an immersion blender and can buy the red beet already cooked (if not, peel it, dice it and use your pressure cooker, red beets takes a rather long time to cook).

Vegan red beet spread
1 cooked red beet
2 teaspoons tahini (sesame paste)
3 teaspoons almond paste
1 or 2 garlic clove(s)

Peel and dice the red beet, peel the garlic. Put all ingredients in your mixing bowl and mix until they have blended into a soft, purple paste. Serve cold over fresh bread, or as a dip.

mardi 10 juillet 2012

I don't claim originality

... but at least a reasonable dose of personal adaptation.
This recipe wasn't totally mine to begin with. My best friend made me something similar a few months ago, and I played with what I had in the fridge and a few spices.

Spinach-hazelnut tart
3 cups frozen spinach or one big salad bowl raw spinach
3 eggs
1/2 cup oat milk
1/4 cup canned tuna or smoked salmon
1/2 cup ground hazelnuts
1 pinch ginger
pepper

Cook your spinach (a few minutes in the pressure cooker after the pressure is on will do it just fine), then drain it and cut it into small, small bits.
Roll out your dough onto a lightly floured surface, then transfer it into a greased mold. Pre-heat the oven at 360°F.
In a large-ish bowl, beat the eggs with the milk, add the spinach, the fish (in smaller pieces), the hazelnut and the spices. Pour the filling over the dough, fold the edges of the dough over the filling.
Bake in the oven for 30 to 40 minutes, until the dough is dry and slightly golden. Serve warm or cold.

The only thing to be mindful of, if you watn to play with proportions, is that the fish will add quit ea lot of salt, so don't add too much of it.

mercredi 25 avril 2012

Don't tell me I can't do that - or a slight case of masochism

I swear, I'm not forgetting the main focus of this blog - easy, everyday recipes. But every once in a while, I do get ambitious. It's not really my fault, you see, I can't help it. When someone tells m "oh, this is just so complicated, I'd never do that !", I have to try it out for myself. Happily, this is something I share with my wonderful husband, who has become a master in puff pastry, cream puffs and a lot of other things I deem too complicated to make myself.
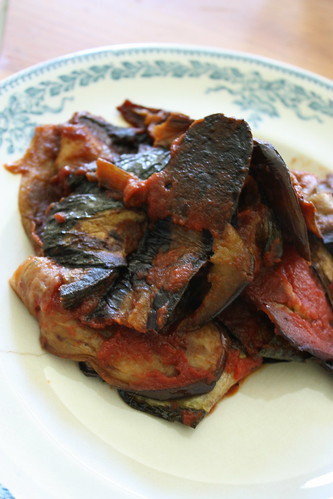
This time, it was my mother telling me about a fried eggplant dish a friend of hers does. I love eggplant. I had eggplant in the fridge that was a tad overdue. I also had zucchini, canned tomatoes, and motivation. This is what came out of it.

Fried eggplant and zucchini
5 eggplants
8 zucchinis
2 cups canned tomatoes or tomato paste
a lot of oil
kitchen paper

Wash the eggplant and zucchini, cut them into really thin slices (1/8 inch if you can). Pat them dry.
In one (or better : two or three) large flat cooking pan, pre-heat enough oil to cover the bottom of the pan. When the oil is hot (but not smoking), place zucchini and eggplant slices flat on the bottom of the pan. Cook them until the underside is lightly golden, Flip the slices onto the other side, cook until golden. Place the slice onto kitchen paper to absorb the excess oil. Repeat until all slices have been cooked - you might need to add more oil to the pan(s) between batches.
In a large oven-proof dish, alternate one layer of fried vegetables and one layer of tomato. Place in the oven (around 360°F) for 10 minutes, just enough for the tastes to infuse... and for the first slices you fried to be reheated.

Now, that took about two hours to make. After I was done, half of the kitchen was greasy and needed a good clean-up. And I can't say it's a light dish. But I must admit, it was quite tasty. Would I make it again ? Probably not, as my body sent me a very clear message "hey ! You know that lactose thing ? We think fat is just the same as lactose !"

dimanche 22 avril 2012

On eating a female gardener

What ? Cannibalism ?

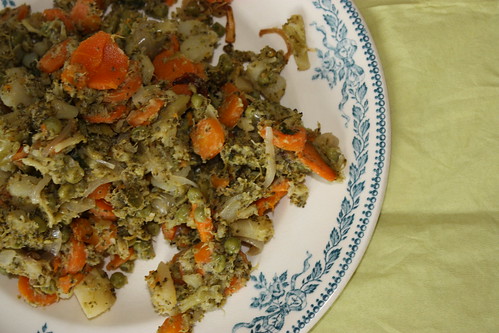
Not really. Just a simple jardinière, a tasty plate of spring vegetables.

Jardinière de légumes
2 broccoli
8 carrots
1 cup frozen green peas (I admit it, they take too long to prepare fresh, so I mostly buy them frozen)
3 potatoes

Wash the broccoli and cut it into small bits. Peel and dice the carrots. Put the broccoli, carrots, potatoes and peas into your trusted pressure cooker and cook for 20 minutes.
Peel and slice the onion. In a large cooking pan, preheat a good dash of oil and cook the onion until soft and lightly golden. Add the other vegetables, stir well and sauté everything for a few minutes.

I have been neglecting my blogs a little of late, I'm really sorry about that and I'll try to be more regular in my posts. I have some posts I want to make, but the crème brûlée is not playing nicely. I'm on my third try and still not 100% happy, drat !

jeudi 12 avril 2012

First taste of summer

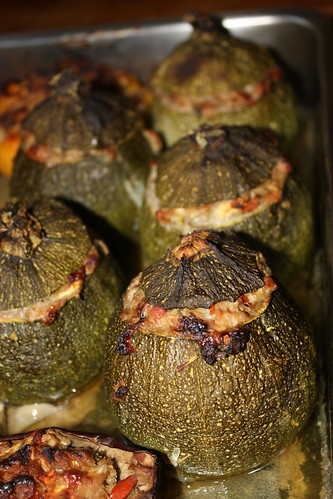
It's technically a summer dish, but the first round zucchinis appeared at our local market last week, and I couldn't pass them up. No big round tomatoes yet, though, so we just bought some small ones and added them to the stuffing. Usually, we'd carve those out as well and the juice and flesh would go into the stuffing.
It takes a while to cook, two solid hours. But it's worth it. It gets better with reheating, so my advice is to cook it in advance and reheat it. It freezes well - just reheat it in the oven for dinner !

Légumes farcis - stuffed vegetables
2 bell peppers
2 eggplants
5 round zucchinis (you can make do with long zucchinis, but they aren't as easy to stuff)
8 tomatoes
10oz ground beef
10oz ground pork
2 cups hacked stale bread
herbes de Provence (savory, thyme, sage, basil, rosemary)
oat milk
ground black pepper

Place the stale bread in a bowl and pour some oat milk over it. Stir from time to time until all the bread is soft.
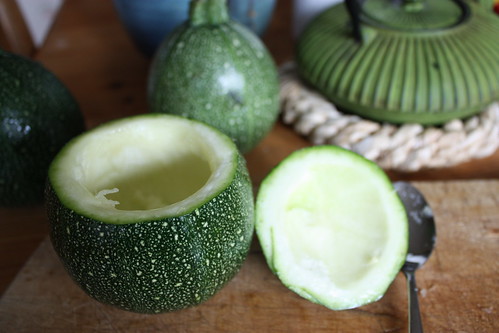
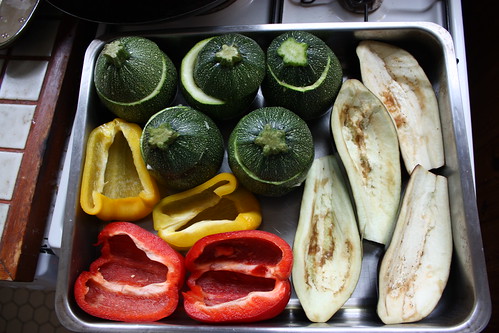
Wash the vegetables. Cut off the top off the zucchinis and carve out their insides with a teaspoon (keep the flesh, don't discard it). Cut the peppers and eggplants in half, cut off and discard the stem. Carve out the insides of the eggplants as well. Place the hollowed out vegetables in a large pan with relatively high edges, with a dash of olive oil at the bottom of the pan.
Now take the flesh of the zucchinis and eggplants, dice it and add it to the bread mixture. Add the diced tomatoes, herbs, a good dose of black pepper. Add the meat little by little, kneading small bits of meat into the stuffing - the meat tends to stick to itself and not mix well with the remaining ingredients, so take your time to separate it into smaller bits and mix well. I haven't found a better instrument to do that than my two bare hands :)
Stuff the vegetables, replacing the "lid" on the zucchinis (and tomatoes, if you've found tomatoes big enough to use that way) after wards. If you have too much stuffing, either make little domes over the vegetables, or, if you really have too much, stuff the spaces between the vegetables.
Add a little water to the pan, just enough to barely cover the bottom of the pan. Bake in the oven, 390°F, for two solid hours, or even a little more. Serve hot with rice.

I don't have a set quantity of vegetables I put into the dish, I wash and prepare just enough so that the pan is full. You can pretty much adapt the recipe to other vegetables - onions, potatoes, small pumpkins in winter.

jeudi 5 avril 2012

[insert movie title here]

I *adored* the movie. But I've loved the dish even longer. I know it's not perfectly right for the season, but Ihad those poor, sad eggplants in my fridge, the zucchinis were cheap and.. well, I just love ratatouille. As with all good stuff, the proportions are just a suggestion, make with what you love and what you have at hand !

Ratatouille
3 eggplants
4 zucchinis
10 small tomatoes
3 bell peppers (1 red, 1 yellow, 1 green, I love to get a little bit of each taste)
2 onions

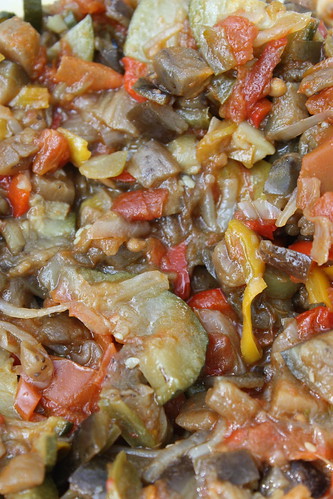
Peel the onions, wash the other vegetables. In a large pan, preheat a small blob of olive oil. Don't be shy, it's not going to be much compared to the amount of vegetables anyway, and it tastes good ! Slice the onion and start cooking them, stirring regularly. Dice the eggplants, tomatoes, zucchinis, peppers and dd them to the pot as you go. Stir, stir, stir. Once everything is on the stove, cover the pot  and let simmer for 15 minutes. Then come back and check how much liquid has formed in the pan.  If there's too much juice, leave the lid off while the ratatouille cooks. If the quantity of liquid is right for you, then keep it covered. Cook until the vegetables are soft, then cook ad little more, checking the juice level now and then. It's not a soup, but it should stay pretty juicy.
It reheats well, either on the stove or in the microwave.

dimanche 1 avril 2012

So where did the beets go ?

I haven't forgotten about this blog, I've just been... busy. As it frequently happens with two young children, friends coming over, and way too many projects on my hands.
A while ago, I posted about finding raw red beets. They've been cooked and eaten ! Here's how...

Potée aux betteraves (red beet stew)
2 red beets
about the same volume pumpkin
2 sweet potatoes
2 onions
1 saucisse de Morteau (a very large smoked sausage)

Proportions don't need to be precise, and don't hesitate to mix things up a bit !
Peel and slice the onions. In a large cooking pot or a dutch oven, preheat a dash of oil, add the onions. When the onions are translucent, add the diced Morteau (you can pretty much substitute any nicely salty, smoked or not sausage(s) )
Peel and dice the beets, sweet potatoes, and pumpkin and add them as you cut them to the pot. Stir some more. Add water until it almost covers the ingredients. Cover and let the stew simmer over low heat for.. a long time. One hour is a minimum. Beets take a long, long time to cook, and the more cooked it is, the better the stew will taste.
It is done when the vegetables turn to mush under the fork. And yes, it's very purple. Very, very purple. :)
Mama's note : mix it all together for a baby-proof meal. See background of the picture for proof.

Now, you can perfectly use pre-cooked red beets for this, the tastes won't mix exactly the same but it will be very good, too. I tend to prefer using my cooked beets in salads like say...

Winter salad, take 142358
1 red beet
1 endive
1 apple
1 handful corn salad
1 hard boiled egg
1 handful walnut

Dice or slice the vegetables, hack the walnuts and generally cut everything into small bits that can be easily mixed together. Yes, even the salad. If you're using something with bigger leaves like lettuce, pre-cut the leaves with your kitchen scissors - it makes for easier eating. Serve with a salad dressing made with a dash of walnut oil.

mardi 27 mars 2012

Chards - it all goes in !

Today I learned that some people only eat the leaves of chard and discard the rest. This is a new concept to me, as my mother was from the opposite "religion" - cook the ribs, discard the leaves.
As for myself, well, I love chard. It's one of my favorite vegetables - always has been. My kids tend to think the same. So here's my current staple chard recipe, both for very little ones and grown ups, and you can pretty much use the whole plant for it.

Purée de blettes - chard purée
Chard
A few potatoes
Oat milk
Vegetal butter substitute (or real butter if you will eat it)
A pinch of curry

Wash the chard, cut off the very base of the ribs (the really hard part that holds them together) if it's still there, discard the bits that are damaged or dry, cut all the rest into small-ish bits.
Peel and dice the potatoes.
Cook the vegetables in your pressure cooker for a good 20 minutes. Pour the water out.
Add a little butter, one glass of milk, curry to taste. Using a hand mixer, mix thoroughly.

It has a little taste of comfort food while still being full of good greens. I'm afraid to say we all licked our plates clean (figuratively speaking... ) and the hubby had none of it.

mercredi 21 mars 2012

Baking week-end

There was a bit of a baking orgy this week-end. We spent Saturday and Sunday with my parents and ended up with three cakes for four persons. My Mom baked a candied fruit cake, my husband turned the way-too-early strawberries into a yummy strawberry tart, and I made a gâteau d'Aunis - because I was out of bread and hungry. Then after we went home on Sunday evening, dinner consisted of an onion tart (and some leftover rice).

The onion tart is one of those recipe that I have stored in the back of my head and don't need to look at my recipe files to make. No precise measuring, not too many ingredients - that's good in my book ! The only real difficulty is surviving the onions without weeping yourself to death. I do have a secret weapon : safety goggles. The kind you find at the hardware store for dealing with plaster or other stuff you don't want to get into your eyes. A friend of mine uses diving goggles.

Onion tart
10 onions
2 tablespoons mustard
7 oz (one small package) almond cream
1 egg
2 tablespoons flour
oil
1 big glass of dry white wine (optional)

Roll out your dough over a floured surface, grease a tart mold (I used a large, not very high one, but you can also use one that is smaller but higher, it doesn't really matter), place the dough in it.
Peel and thinly slice the onions (with the goggles on ;) ). Heat a good glob of oil in a large pan, once it's hot add the onions and cook them, stirring regularly, until they're very tender. This time I had some white whine leftover in the fridge, so I added it to the pan at the end and let it evaporate.
Pour the onions into a large bowl,  add the cream, the flour, the mustard, the egg and mix well. Pour this filling over your dough. Fold the dough's edges over the filling.
Bake in the oven for 30 to 40 minutes at 360°F. The filling should be golden brown and the dough dry and firm to the touch, just a little golden. Serve hot.

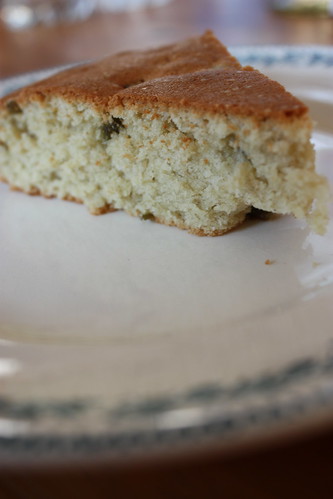
Below is my usual recipe for the cake. I changed it a little this time - I had egg whites remaining from the strawberry tart my husband had made, so I used only one full egg and replaced the other with 4 egg whites I had beaten until stiff. It worked just as well.
Gâteau d'Aunis (Aunis cake)
6 oz vegetal butter substitute
7 oz sugar
2 eggs
8 oz flour
2 oz candied angelica
1/2 cup cognac or rum

Cut the angelica into small pieces and put it in a bowl with the alcohol.
Beat the sugar with the butter until it gets white-ish. Still beating, add the eggs one by one, then the angelica and alcohol. Lastly, add the flour.
Grease a mold (mine is about 10 inches wide and 2 1/2 inches deep), pour the batter in it. Bake in the oven, 40 minutes at 390°F.

lundi 19 mars 2012

Caviar...

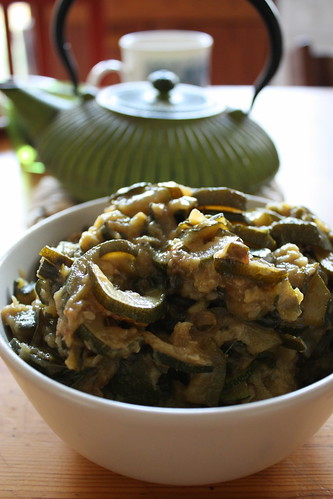
Not real caviar, no, I'm not that full of cash to cook anything with it. I must even admit I've never tried it. But I do make eggplant caviar on a regular basis. You can eat it as a dip, or as a spread. We generally eat a few mouthfuls over a little bit of fresh white bread.
I have to give credit where it's due, though, and say that I didn't personally make this one. It was made by my dear friend Eysméralda - but it still fits the title of this blog, and I wouldn't have made it much differently.
I know it's not the traditional way to cook it - usually, one would roast the eggplants in the oven. I tried. I burnt my fingers removing the meat from the skin. And there was one casualty. The first time I cooked this, I killed my oven. I had forgotten to cut off the ends of the eggplants before roasting them. They exploded, taking the door of the oven with them.
Okay, the door still hung to the oven. But it never agreed to close again.
For the love of quick cooking, preserving my fingers (the skin stays tender enough to be blended with the rest), and functioning ovens, I turned to the pressure cooker.

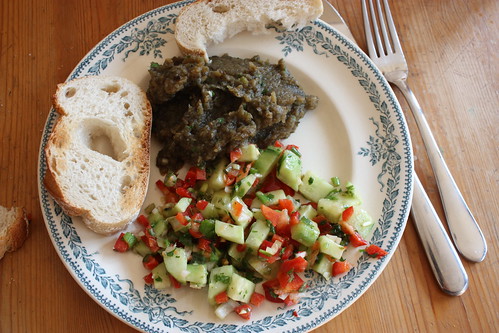
The caviar (on top)
with bread and cucumber-paprika salad
Caviar d'aubergines
4 or 5 eggplants
2 cloves of garlic
1 tablespoon chopped fresh parsley
a few leaves fresh coriander
olive oil
salt

Wash and dice the eggplants, put them in your beloved pressure cooker and cook until they're tender. By the sight of my nose, that should be something like 20 minutes.
Cut, peal and hack the garlic and herbs.
Put the eggplants and oil into a bowl and use a hand mixer to turn them into a somewhat smooth paste - don't worry if its not perfectly smooth, it doesn't have to be perfect to taste good ! Add the garlic and herbs. Serve cold. Or hot if you're very hungry and don't have the time to wait until it's completely cooled.

Now, there are dozens of way to prepare this. You can mix up spices and herbs, add lemon... Try a few things out and find what you like best ! You can cook a lot of the caviar, and keep it in the fridge for a few days.

samedi 17 mars 2012

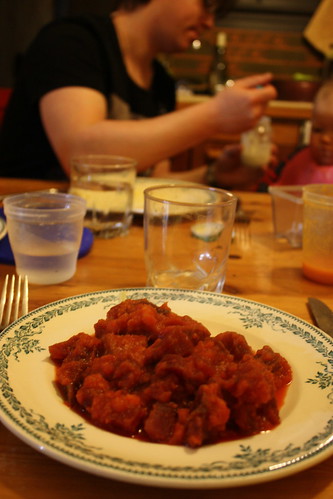
A not completely picture-less stew

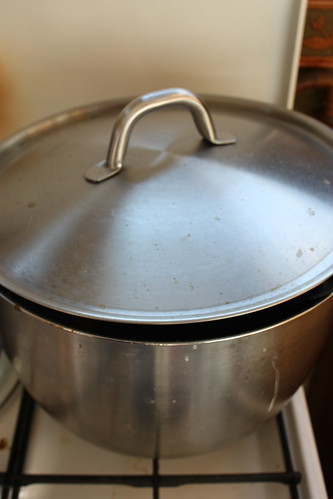
Have you ever tried taking pictures of a really thoroughly cooked stew ? Well, mine didn't look that pretty. I tried, it looked horrible, so I'm just going to show you the pretty big pot we used to cook it. So the stew is in the picture, it's just not... visible.
We started cooking this with pork, but we changed this time after looking at what was in the fridge - one used-to-be-a-laying-hen chicken, fat and tasty but in need of a good boil so as not to be too chewy.

Kiwi stew
1 chicken, cut into pieces, or pork...
10 kiwis
3 leaks
4 carrots
Oil, salt, pepper, ground red chili pepper

Cut the meat into bits no bigger then a child's fist.
Wash and thinly slice the leaks. Peal the carrots and kiwis and cut them into small dices or slices.
Heat a dash of oil in a big cooking pot with a heavy bottom. Add the leaks first, stir regularly until they get a little softer. Add the meat, stir some more. Lastly add the kiwis and carrots, pour water in the pot until about an inch below the level of the ingredients, add salt, pepper, and a small pinch of ground chili. Let it cook for one to two hours - you can cook it a day or two in advance, and reheat it for half an hour or more before serving. Just check that there's still enough water and add some so that it doesn't get dry.

mercredi 14 mars 2012

Winter greens

Granted, the winter is fleeing the country at full speed today, but we still haven't seen many spring vegetables yet. So what do we eat right now ? I recently bought a salad sprouter, and we've been eating tons of winter salads with sprouted seeds. Mustard seeds are my current favorite, I love the bite they add to my salads.
I'm sorry I don’t have any pictures today, I didn't have time to photograph it before it was eaten up. I hope this won't happen too often around here, but well... sometimes it does.

Winter salad (with some not so winter-y imported stuff, yeah, I know, I know...)
1 apple
1 handful corn salad
1 handful baby lettuce
1 red bell pepper
1/2 Belgian endive
1/2 handful sprouted mustard seeds
1 handful gizzards (you can substitute some bacon strips)

Wash and cut the salad leaves in small pieces, put them in a large salad bowl. Wash and cut the pepper and endive into small bits, add them to the salad. Do the same with the sprouted seeds.
Dice the gizzards (or bacon, or any small salty meat bits you fancy), grill them in a pan with a dash of oil until they turn lightly golden. Let them cool and add them to the salad.
Serve with salad dressing (don't add the dressing directly to the salad bowl, it "cooks" the salad leaves and any leftovers you would have would look pretty terrible on the next day).
WhileI'm at it, I can add a simple basic...

Salad dressing (a list of possible ingredients)
Strong mustard
Red wine vinegar / Tamari / Honey
Olive oil
Sunflower oil
Salt
Pepper

My recipe tends to change every time I make it, but the theory mostly stays the same. Take a small bowl. Start by thoroughly mixing 1 tablespoon mustard with vinegar. You can also add tamari or honey. Then, very slowly, add the various oils, stirring all along - you can do this with a simple fork. The dressing will get thicker and opaque as you add the oil. Add salt et pepper to taste, other spices if you want.
Sometimes, the dressing just doesn't ant to build a real emulsion, and the ingredients don't blend well together, or the oil separates form the rest after a while. Just mix again right before using the dressing, and don't worry, the taste will be the same. :)

mardi 13 mars 2012

Apple tart

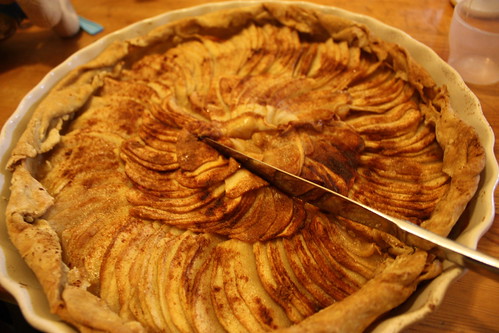
For some reason I hadn't made one in a long, long time. I suppose it's such a simple recipe, I often try to make something fancier when I bake, especially when we have guests. But we didn't have guests this week-end, we had apples - and no one really eats that many raw apples at our house - , and I was feeling like baking something simple.

Apple tart
1 pastry dough
3 apples
sugar
cinnamon

On a floured surface, roll out your dough. Grease a large round tart mold and put your dough in it (the easiest way is to flour the surface of the rolled out dough, roll the dough around your rolling pin, and unroll it over the mold), leaving the edges of the dough to fall outside the mold. Sprinkle some sugar on the dough.
Peal the apples and slice them thinly. Put the apple slices onto the dough, sprinkle them with some sugar and cinnamon.
Fold the dough edges over the tart. Bake in the oven for 40 minutes at 355°F. The apples must take a nice golden shade.

lundi 12 mars 2012

Small bites

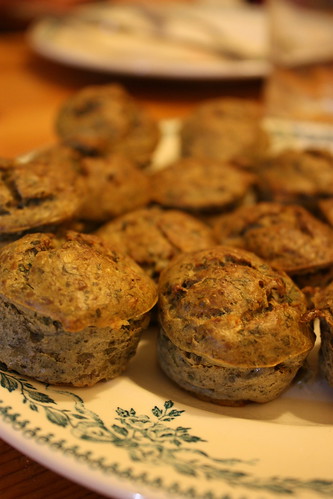
I had made those ages ago, forgotten about them, then yesterday I had the inspriation again. Looked at my old recipe and... oh boy ! Did I make things complicated ! Moreover, it was full of lactose. So I changed things up a bit, and I'm happy to say they're better now !
Now, I know a lot of people don't appreciate liver. I won't pretend those don't taste like liver, but the taste is definitely not as strong as just eating a grilled steak of liver.

Mini liver cakes
3 veal liver slices
1 handful fresh parsley
1/2 handful fresh coriander
2 fresh green onions
2 eggs
3 tablepsoons four
1 teaspoon baking powder

Roughly cut into pieces the liver, the onion and herbs, put them all into your food processor and mix them into a sort of... paste. I doesn't look very good at this stage. Add the flour, eggs, baking powder, mix some more until everything is well blended together.
Pour the batter into mini-muffin silicon molds - I assume you could use other molds, but tI haven't tested how the cakes will bake nor how hard it will be to take them out of the molds. Bake for 30 to 40 minutes, 355°F. If the cakes tend to stick to the molds, you can wait until they're cool, they will be easier to handle.
Serve warm, or cold with mayo.

dimanche 11 mars 2012

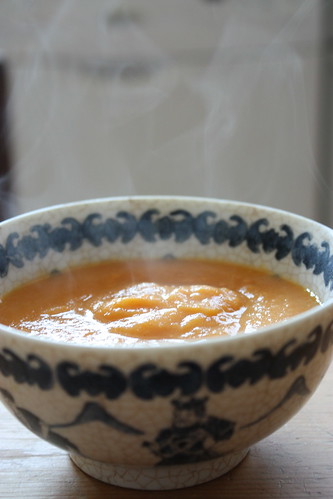
All orange spiced carrot soup

I bought carrots last week, and when I looked at them this morning... ewww, not good. They weren't rotten or anything, just extremely dry and hard and definitely not looking like they'd do a great job as carrots. So into a soup they went ! In the summer I put tomatoes in it as well, but I've learned to NOT buy tomato when it's not the season, because they taste like cardboard - or worse. You could add canned tomatoes if you want.

All orange spiced carrot soup
10-15 carrots
5 oranges
3 potatoes (for a creamier texture)
1 cup almond cream -or almond milk
1 cube chicken stock
cinnamon, black pepper, ground chili pepper

Peel and sorta slice the carrots - you don't have to make thin slices, it will all get puréed in the end.  Put them in a pressure cooker. Peel the oranges and add the quarters to the carrots. Peel the potatoes, dice them, add them to the rest. Add 4-5 cups of water and the chicken broth, close the pressure cooker, cook for 20 to 30 minutes. Add spices to taste and the almond cream. Mix using a hand mixer (or something else, you choose your weapon). Serve.

Prep time : 30 minutes. Cooking time : by the time the older has finished his sausage, the vegetables were ready to be mixed. The baby loooved the soup. That's the neat thing about soups, I can serve the exact same thing to everyone in the family, them being 9 months or 32 years old.

ETA : that was a LOT of soup ! It serves at least 6, more likely 8 people.

Market day

We went to the market yesterday to buy some much needed groceries. Actually, I also made a short stop at another market on Thursday - a little further from home, very very small, but with bio stuff. This is what I got then.
2 dozen eggs
corn salad
fresh green onions
RED BEETS !
I'm super excited about the red beets. It's so rare to find them not already cooked.  They give a wonderful sweet taste to stews, work well with sausages... I'm not sure yet what I'll do with them but I will find something, that's for sure.
Yesterday we got this.
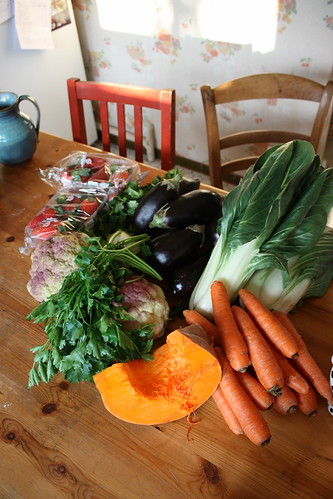
Pumpkin, cauliflower, parsley, coriander, carrots, eggplant, chard... WAIT ! WHAT am I going to do with strawberries in March ?!? I did not buy the strawberries, mind you, they were given to us for free by the seller.
Wow, strawberries, in March. I don’t expect them to taste like anything I won't put in the bowl with them. What the frack am I going to do with strawberries in this season ????

samedi 10 mars 2012

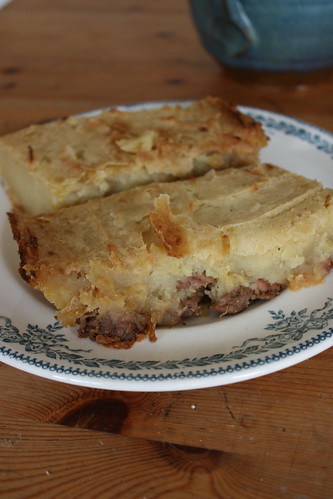
Hachis parmentier

A simple winter basic, cheap, easy to cook in large quantities. You can freeze some of it and reheat it in the oven later.

Hachis parmentier
6 large potatoes
2 tbsp butter or vegetal sustitute
1 cup oat milk
11 oz ground beef
11 oz ground pork
 2 large onions
thyme, laurel, rosemary
salt, pepper to taste
optional : 1 cup grated cheese

Peel and dice the potatoes, cook them in a pressure cooker until you can squash them with a fork.
Peel and thinly slice the onions. In a pan, heat one dash of oil over strong heat, put the onion and stir them regularly until they get a little transparent. Add the meat, separated in little clumps, salt, pepper, and herbs. Stir and sauté  the onion and meat mix until the meat is nicely golden.
Squash the potatoes, adding the butter and milk as you go (you can also use one small cup of almond or rice cream instead of the butter + milk).
In a large oven-proof pan, spread the meat mix first, and the mashed potatoes on top of it. Add some cheese on top if you wish/can. Cook in the oven at 250°F until the top is lightly golden.

It's one of those dishes that reheats well, so don't hesitate to cook it in advance and just reheat it for dinner.

vendredi 9 mars 2012

What's cooking tonight ?

I may or may not post complete menus on a regular basis. I was quite happy with yesterday's productivity, so here it is. Fast,  mple and tasty.

Entrée : small red radishes, with salt and butter.
Meat : boudin blanc, grilled in the pan
Vegetables : sautéed zucchinis
Cheese, fruit, yoghurt for those so inclined.
The baby had some zucchinis mixed with left-over fish, and some (purposely) over-cooked rice and peas.

Total prep time : 30 minutes (+ about 10 minutes where everything was simmering on the stove and I was putting the plates on the table), for 4 persons including a toddler and a baby. The only real recipe for this is the zucchinis.

Sautéed zucchinis
7 big zucchinis
2 garlic cloves
1 shallot
1 fresh green onion
oil
1 cup beef stock

Wash the zucchinis - if you're reasonably confident they haven't been dipped in fertilizers and pesticides, you don't need to peel them. Cut them in two or four lenghtwise.
Put a big pan on the fire, with a dash of oil in it. Peel, slice thinly and hack the garlic, schallot and onion, put them in the pan over strong heat and stir regularly so that they don't get brown.
Slice the cut zucchinis and add them to the pan little by little. Stir each time you add something to the pan. After adding the last zucchini to the pan, pour the cup of stock over it - most of the time I used the ready-to-use dices of stock, I just crumble them over the pan and add a cup of water. Cover, let simmer for 10 minutes, then leave uncovered so that the liquid evaporates a little.
The zucchinis should be soft, somewhat mushy once cooked.

jeudi 8 mars 2012

Zombie tart - or the very not pretty lemon tart

2011-04-13 I know this one is extreeeemely ugly. I also know it was a huge success. The green is green food coloring, because I used up an old supply of green colored sugar from our wedding. I suspect it would look a little more brownish (and not so funny) without the coloring.

Lemon tart
3 lemons
sugar to taste (between 1 and 2 cups, possibly more)
1 handful flour
2 oz butter or vegetal butter substitute
1 egg

Roll out your dough in a wide, low pan. Put another, slightly smaller pan (with a very clean bottom, or with some baking paper under it) into the pan, weigh it down if necessary (water is good, some lentils you'll never use can also work, or a handy rock). Pre-bake it in the oven - 15 to 20 minutes at 355°F. It should be hard to touch but it doesn't need to be golden.

Swueeze the juice out of the lemons, put it in a pan with half of the fat and some sugar. Taste the sugar + lemon juice mix so that it's not too acid for your taste. Put the pan over medium heat and stir until the sugar and fat have melted. Take it off the fire.
In another pan, melt the other half of the fat over low heat. Add the flour and stir together. You'll get a sort of solid dough. Don't panic ! Add just a teeny tiny little bit of the lemon-fat-sugar liquid mix. Stir until it has been absorbed by the dough (always on very low heat). Add just a little bit more of the liquid, stir again. Keep working the liquid into the dough until it has a creamy, almost liquid texture. Work slowly, add the liquid in small quantities, stir a lot each time, and you shouldn't get clumps. It takes a little time and a little bit of muscle - but then, I am a weak woman with matchsticks arms.
Now you have something that looks like a creamy filling, take the pan off the fire, add the egg and quickly mix it into the lemon... thing. Put the pan back onto the fire, over low heat, and let it thicken a little white (just keep stirring, just keep stirring).
Pour the filling over the pre-baked dough (don't forget to remove the upper pan before doing so... ). Bake the tart in the oven, 30 minutes, 300°F. It will bubble some and look weird.
Serve it cold.

A basic : pastry dough

It's not really a classic "pâte brisée", it's not really a precise recipe either - and I don't have pictures. But since I have several tart recipes ready to post with the ingredient "one pastry dough", I figured I should start with this. I use it for quiches, desserts and salty tarts as well.

Basic pastry dough
2 big tablespoons of butter - or vegetal butter subsitute
1 dash of oil (I like olive oil for the taste, but you can mix various oils according to your taste)
1 small glass of water
2 to 3 cups of flour
1 pinch of salt

Put the butter or substitute in a small bowl and melt it in the microwave (if it's not completely melted stir for a while and the remaining solid blobs will melt as well). Add the flour, oil and salt, start lightly mixing with your hand. At this stage your dough is a little fat and a little dry at the same time. Don't try to turn it into a ball yet !
Little by little, add some water, keep kneading lightly. Don't press or twist the dough too much or it will become hard once baked. With the water the dough will get more cohesion. Knead it lightly into a ball. Dust your tabletop with flour and simply roll the dough onto it - you don't need to let it rest before using it as it contains less butter than a regular pâte brisée.


I know it might seem off-putting to not give more precise measurements, but really, I go by a rule of thumbs to make my dough. Adding the water little by little allows me to stop when I have the right consistency - easy to knead, not too heavy, not crumbly anymore, not sticky either. At this point the dough doesn't stick to the skin anymore, just rub your hands with some flour to get rid of what is still attached to your fingers. If you added too much water and the dough got sticky, just compensate with some more flour.
With experience, you'll get a idea of yow much fat and flour you need for variosu quantities of dough.

Just remember :
  • don't over-knead the dough (it will still taste good, but you'll need a good knife to cut the portions)
  • don't stress :)
You can replace the butter by other fats, according to a wise cook I know, incorporating many different fats makes for a tastier dough. One way to decide how much oil to use it to pour the flour into the bowl, put your finger into the flour, vertically, and fill the hole with oil. It's probably not a scientific method, but it amuses me.
Off course, you can spice it up, with one tablespoon of sugar for sweet tarts, some spices, ground hazelnuts or almonds, ... (I have to admit, I rarely do, because I'm often lazy in the spices department, shame on me !)

Okay, now I've typed a mile-long post for something that's extremely simple, I hope I haven't scared off anyone !

lundi 5 mars 2012

Easy peasy chocolate cake

This is the recipe that started it all, one I wanted to keep track of : just a simple chocolate cake. Not too chocolatey, quickly made and errr... well, quickly eaten, I have to admit. It didn't last 24 hours between just my husband and me. Oopsie ! But hey, chocolate + cake ? It can't be a bad start for a cooking blog !

A few words beforehand : this is unnecessarily complicated. If you want to make vanilla sugar, take a vanilla bean (if it has already been used, let it dry a little before using it. No, it doesn’t have to be brand new), put it in an air-tight container with sugar for a few weeks. That's all it takes. In most cases, you can substitute a small dash of vanilla extract.

Easy peasy chocolate cake
5 eggs
1 1/2 cup sugar
1 1/2 cup flour
1 teaspoon baking powder
1 tablespoon vanilla sugar (or a dash of vanilla extract)
7 oz dark, unsweetened chocolate
1/2 cup vegetal butter substitute

In a large bowl, mix the eggs and sugar, add the flour, baking powder and vanilla sugar or vanilla extract. Put the butter and chocolate in a small bowl and melt them in the microwave - use the lowest possible heat and only microwave in short spurs, mixing thoroughly in between. Add the chocolate mix to the rest of the batter. You should now have a chocolatey creamy mix. don't eat it right away ! :)
Grease and flour a pan, pour the batter in, bake for 25 minutes at 355°F. Try to wait until you can touch it to eat it (we had trouble with that last point)